
Purpose
Articles are your main source of communications within the Cleary platform. These can be published ad-hoc or on a regular cadence. They may contain company-wide news, local office announcements, or product team updates. They can be targeted to a certain audience and are categorized in a way that allows users to subscribe to similar future updates. After publishing, you will also have access to the article stats.
Set Up
To write company-wide articles, a user must have the "Article Creator" permission enabled. Learn more about users and user permissions here.
Writing your Article
To create an article, select the "Company Update" option from the pencil icon or access the Admin > Articles section and select Create a New Article.
Content
You'll start in the Content Tab. Here you can add an article type, tags, and enter the main content of the communication.
You can save your content at any time by clicking Save Draft on the top right of the Article Editor.
Templates
- You'll also be able to start from a template! For more information on templates, click here
Change the display author (optional)
- This is a good idea if you’re publishing on behalf of someone else. However, it is not a required field. If no author is entered, then none will display on the published post.
- If you’re writing on behalf of a team or group, you can enter custom text clicking the “Click here” underneath the text box
Select your article type and tag to categorize the content:
- Article types and tags allow for organization of news when navigating the News tab in Cleary.
- If you have Team Updates enabled, you will be able to create both Company Updates (Articles that post to News) and Team Updates that post to Team Pages from the Admin > Articles page.
Embedding Videos:
- To upload a video click the video icon in the Article's styling bar. You can then upload by URL, upload, or embed code:
- Once uploaded, click on the video and you'll also see a sub-menu pop up with options regarding Delete, Change Thumbnail, Change Size, and Autoplay:
- Clicking the trash icon will delete the video.
- Clicking Change Thumbnail will allow you to change the thumbnail of a video, or upload your own!
- Clicking the ruler icon will allow you to resize the video. This can also be done by dragging the edges
- Clicking the Autoplay icon will allow you to set whether this video autoplays, or starts playing once clicked.
Generating a Zoom Recap
When creating an article, you can click the following button to add a Zoom link:

Once added, you can select to Generate a recap of this Zoom meeting.
Note: You'll want to ensure the Zoom link provided is the meeting link, not the Zoom recording link. It should be in a format similar to "https://us02web.zoom.us/j/123456789".
Read the Zoom integration article for more information.
Social Sharing
When writing an article, you can click the icon in the formatting toolbar to insert a Social Share, encouraging employees to cross-post a link to social media!
Once clicked, paste the link of the article as well as suggested text for employees to use when sharing. This will populate the banner image used for the article, which you can change with a new URL or reposition by zooming in or out.
After clicking Insert, the social share will be present in your article. After clicking Share this link in the article, they'll be prompted to share with their social media networks.
Adding Associated Employees
- You can use the @ symbol and type an employee's name to add them as an associated employee. The card view will show “X people were mentioned” near the byline. If you hover over that, a pop-up will display that you can scroll through to reveal the names and photos of those mentioned.
- This will also pin the article content to their user profile.
Summary Card
After finishing the main content of your article, you'll move the Summary Card tab
Some users choose to write their article page content first, and then write a quick 2 sentence summary on the card. The Summary Card will show up in the homepage news feed, and the full content of the article will be sent via email.
Longer articles without a summary are shortened automatically on user's home feeds with an option to "read more". The full content of the article will be shared in email notifications.
If you only write your content in the Summary, the content for the Article will default to your summary content in the feed, emails, and the article's page.
If you paste a long article's content in the summary, it will display the entire article in the user’s feed and email.
Audience & Settings
Select an Audience
You'll now select an audience to share this communication with. You can either share with the whole company by clicking Everyone at the company, or define an audience through rule based audience targeting by clicking Specific group of people
Selecting "Specific groups of people"
Selecting this option will allow you to customize an audience based off department, role, worker type, team, or whatever else may be set up through your HRIS Import.
- Looking to target a group not listed? Reach out to Cleary and they can work through how a custom targeting group may be set up.
You can use and rules to more narrowly define an audience. For example, you can set a rule for all of the engineering department to receive an article.
However, you can use + and to create a rule so that only managers in engineering will receive this communication.
You can also use OR rules to add another group to this audience. In the above example, let's say you need to address this rule to all managers in engineering, but also need to loop in everyone, managers and non-managers, in HR. You can click + or and write a new rule:
Once your audience is defined, you'll see your audience size beneath the audience you've selected.
Access
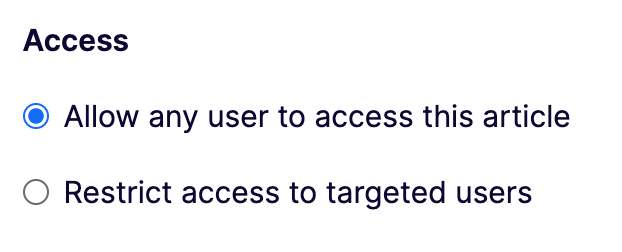
- Allow any user to access this article
- This will allow any user to access this article through search or by browsing, even if they're not in the selected audience
- Restrict access to targeted users
- No one outside of the targeted user will be able to see the article. If they search for the title, it will not display for them in the search results. If a targeted user who has the URL sends them the link, they will get a “Something went wrong” error when they try to access the link.
Acknowledgements (optional)
Selecting Make article a must-read requiring acknowledgement will add a Requires Acknowledgement banner to the top of the article in the feed. This banner will become red if overdue.
Once opened, the user can click I've read this article to acknowledge.
Notifications
When customizing notifications, you can choose either Notify Entire Audience or Notify only people who have subscribed to selected tags
Notify Entire Audience
- Selecting this option ensures everyone in the audience will be notified based on their channel preference as selected in their Personal settings.
Overriding User Preferences
Clicking the selected text will force a notification to any of the following selected channels:
Using the above image as an example, an email will be sent to everyone in the selected audience, even if a user opts out of emails in their personal settings.
If the first option is enabled in the above image, all employees in the audience will have this article in their feed, ignoring the employee's preferences.
Here, you can also select to send this notification to a public Slack or Teams channel by entering the channel name into the text bar.
Edit Slack Message
Article Publishing
Once finished with your article, click Publish while in the Audience & Settings tab.
You can choose to publish immediately or schedule your article for a later date.
Once Published or Scheduled, you can view your article in Admin → Articles
FAQs:
Q: Is it possible for a user to author an article on behalf of another user? If so, what permissions should they have?
A: Yes, this is possible for Super Admins and Article Managers. For example, an Executive Assistant who needs to publish on behalf of her Manager, but doesn’t need Super Admin permission, could just be an Article Manager.
Q: I'm adding a table to the article I'm creating. Why is this one cell always highlighted in blue? How do I trigger the edit menu for the table?
A: The blue border is highlighting the table cell where you are currently clicking into.
Additionally, to trigger the edit menu for the table (to add rows, change the borders, etc.) you need to right-click while you're within a table to pull up the edit menu.